
That was pretty much everyone's reaction when the 3DHS 60" Slick 580 V2 broke cover. The V2 is definitely going to be the coolest plane of 2017, and maybe even 2018 as well. If you want to be cool, you just have to have one of these.
And that's not even the best part. The best part is the insane level of quality and performance. The coolness is just a nice bonus. Speaking strictly as an Extra man. I still think you can't have enough Slicks, so a slightly larger size than what I am used to works perfectly for me, except I still don't have enough Slicks!


While the 52" satisfies the needs of the original 51" Slick pilots, those who owned a 59" still needed something to replace their aging or crashed planes. The 60" Slick 580 V2 fills that slot brilliantly. I think you will eventually see the entire Slick lineup be reintroduced as V2s, which is a good thing for Slick fans. The 52" Slick is a marked Improvement over the 51". If you have not built a newer Slick you are in for a lot of nice surprises.
Having flown the 52" Slick since last April, I've gotten to know and love it quite well. It's been a superb airplane, so given the chance to have a 60, I jumped right in. I generally fly planes in the 48" to 60" wingspan range, so for me this plane was the missing size I needed. I also needed to have a few more 3DHS planes in the stable, so this plane was a win/win all the way around for me.

Airframe
Wow. This baby is a composite warrior. The new V2 has been given much the same carbon composite treatment that the 74" Slick 580 EXP received...... there is extensive use of composite/lite ply laminate in the motorbox and battery tray units, plus all of the formers all the way to the tail. If that isn't enough, there are also full length carbon stringers and carbon reinforced wing tube and anti rotation pin mounts.
ALL PICTURES CLICK TO ENLARGE

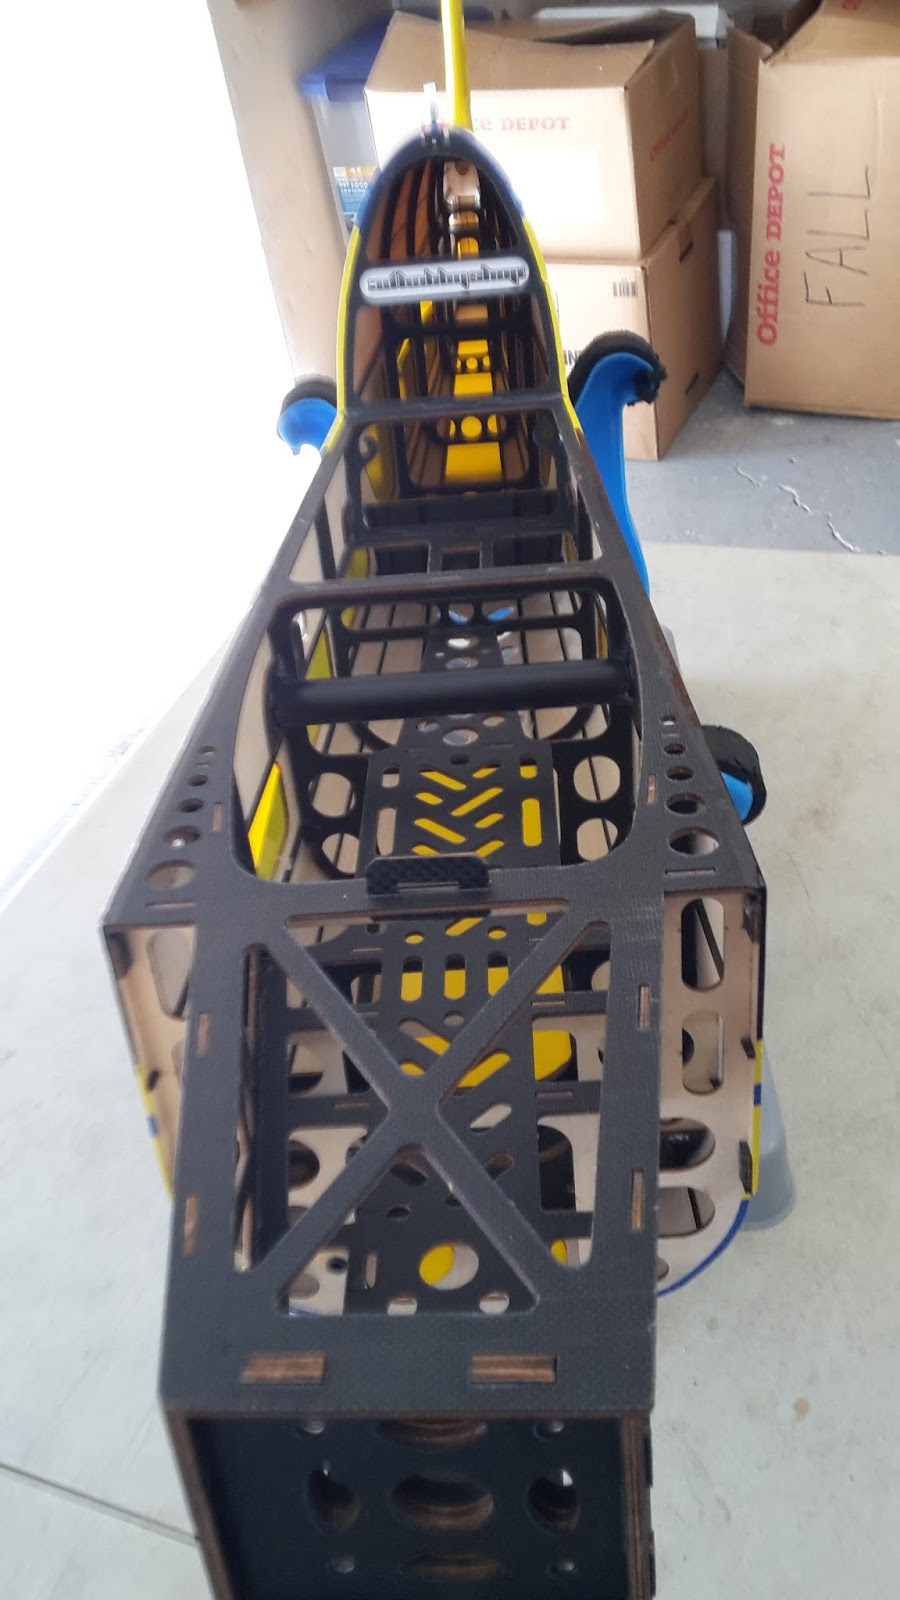

Carbon/ply laminate formers run all the way to the tail. You can also see the bottom sheeting is reinforced with carbon stringers, as well as the turtle deck sides. The top of the fuselage all the way to the turtle deck is also composite/ply laminate. I think we have all broken those top rails once or twice changing out the battery, so it's nice that's so tough on this plane.


The wing tube mountings are carbon reinforced, as are the anti rotation pain mounts. These are high stress areas and reinforcement here makes for a stiffer, longer lasting plane. Also, the rudder tray is not only built with plenty of beef, it's carbon reinforced on top of it. You can also see the precut cooling air exits, carbon stringers and preinstalled air baffle that is just behind the cooling slots. 3DHS went to a lot of effort to make the model as nearly finished as possible.


Motorbox top, sides and bottom and firewall face are reinforced with carbon/ply laminate. I don't imagine they will be selling many motorbox kits for this plane because to break the motorbox you would probably have to completely shred the airplane. On the bottom, carbon longerons reinforce the bottom, and this makes a nice place to mount the ESC )more on that later).
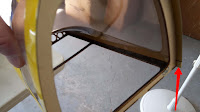


The canopy frame is also carbon/ply reinforced. Notice the G10 composite material pointed out by the arrow. That's the area that always seems to get broken from repeatedly hitting it on the plane when closing the canopy, or the first area to hit the ground when you drop it. This has been reinforced from the beginning n the EXPs, but it's worth pointing out here because it's just more of the total package thinking that went into this plane, Also note the front of the canopy frame is carbon/ply reinforced. This is not normally considered a high stress area, but the carbon fits the theme of the entire plane really well. It's like, that would be the only thing on the plane not covered, so you gotta put some on there.


Another nice surprise is the carbon on the wingtips, stab tips, and top of the fin. I believe this is simply some sort of covering, but it still looks really nice.

Another nice surprise is the guide tubes for the pull cables. This allows for the cable to exit through a small, less visually intrusive hole instead of a large slot like we have had for years. It's also one less thing the builder has to do since it's ready to use.

While Slicks art generally known for their superb harrier and post stall manners without using SFGs, the V2 comes with the choice of conventional SFGs and the 3DHS pioneered "hatchet" style SFGs. These are nicely finished with the big X already applied. Usually I have custom decals made for my SFGs, so it's nice to have saved the expense on this plane.

Also carbon, as is becoming the norm with Big X planes in this size, is 3DHS' carbon tube supported, carbon laminated landing gear block assembly. I have extensively tortured this system in my SHPs and 48" Demonstrators, and they have been golden. I believe you would just about have to destroy the entire plane to pull the block out. Certainly in a really huge hit you can kill the landing gear legs, but they are designed that way so as to save the plane. It's a lot easier to bolt on a replacement gear leg than to rebuild the whole undercarriage.

Man, there is so much to cover on this plane I did not know where to start and it seems like it's never going to end. Finally, I think, the wing bags now feature a nice little pocket for the SFGs. I'm sure there are a few things I missed, and will update a little later.
While you might think Chris and Ben simply went crazy trying to see how much cool composite material they could pack into the plane, every single bit of it is extremely functional reinforcement. It would take too long to list all the composite laminated pieces, but one look at the plane and you can see for yourself. Not only does this make for a stronger, stiffer, better flying and longer lasting airframe, but it also looks so hi tech cool that it's really fun to show off to your friends at the field.
We have seen this sort of composite laminate over lite ply construction before, but never done as well as Big X factory has with this plane.
Having put thousands of flights on Demonstrators that are constructed this way, I can assure you that this construction is purely functional and only looks cool as a side effect. You are not paying for bling that doesn't do anything. You are paying for functional material that also looks great.
New for the V2 is 3DHS and Extreme Flight's exclusive self jigging horizontal stabilizer. I have built three of the 52" Slicks that use this construction and they were all perfectly straight. I have so much faith in how this guarantees a straight assembly that I did not even measure the last stabilizer installation until after I had glued it in.....and it was perfect.
Assembly on this one is a little different from the Extreme Flight 52" Slick in that you install the elevator halves separately from each other, but if you have built a 3DHS plane or two you probably won't even need to look at the manual (though I certainly don't recommend that approach). The only important part of the assembly remains the same on the 60" Slick: you merely have to get the stab shoved all the way forward and it self aligns. Jam it in there, glue it, and you're done. About all you can get wrong is spilling glue on the plane, but if you have a bottle of Golden West Super Solvent on the bench even that's not much of a worry.
Construction in general is getting to be so similar between Extreme Flight and 3DHS that it is hard to tell them apart any more. This is actually a really good thing because only one way can be perfect, and I think we are getting closer and closer to that. There are still little differences, but I believe those are becoming fewer and fewer.
Hardware
It's also nice that Ben and Chris have worked hard to standardize the hardware between 3DHS and Extreme Flight. I am now always working with hardware I am familiar with and trust, and it's also the best hardware you can get your hands on anyway. The V2 uses the same ball links as the 48" and 52" EXPs, and the same Xcessories tailwheel assembly I like so much. All the bolts are the same size as what I am used to using, so I don't have to search around for the right allen tool. I already know what tool to use because I am so familiar with all the hardware. While this might seem like a small thing, it adds up in making the build go smoothly.
Speaking of hardware, the V2 comes with Xcessories' titanium anodized cowling screws. I just love these things because I am not always losing the washer and they are allen head instead of cheesy phillips head. They also use the same allen tool as Xcessories servo screws, and the allen bolt that Extreme Flight sells to hold the servo arms on. Essentially, you can preflight the entire outside of the plane with one single allen too. They are very functional and look great too. Titanium rocks!
Power System
No doubt this was always going to be Extreme Flight's Xpwr Torque 4016/500 Mk II motor and Airboss 80 Elite ESC. We have been using these exclusively on all of our 60" EXPs since the dawn of time and they have always had blistering power and rock solid reliability.

Of course the speed controller on any of my planes is always going to be an Airboss, for this project, the Airboss 80 Elite. I've been using these ESCs in my larger planes since the dark ages and still have not had one let me down. Never change what's working. Again, with this being a completely integrated package, the motor and ESC work together perfectly. Even on fully charged 70C packs there was never a hint of squeal or hesitation, and throttle response is smooth and linear. This is what I expected from the Airboss ESC and what I've become accustomed to with Torque motors. Xpwr certainly got everything absolutely right on this package.
The Airboss 80 already comes with a deans plug installed, so, the hardest part of using the smoothest running, most powerful and reliable power system available is to simply plug and play.

The bottom of the motorbox makes a nice, convenient place to mount the ESC. All the wires shoot straight back and the deans plug comes out where it is easy to get to. I used a balsa block to lift the ESC up a little go I could slide it back over the former. This give you more wire to work with when plugging in the pack, and also moves the CG back a little.
Servos
Recommended for the Slick are Hitec's awesome HS7245MH servo. These are fast, powerful servos that center extremely well. You can run them on voltages from 7.4 to 8.2 volts with no hint of stalling or blowback. Centering is also so locked in that once you trim the plane the first time, that's probably it for the life of the airframe. Centering does not drift off or change, and that means you will have a plane that stays trimmed and flies better.
Yet again, I am not much of a spec kind of guy and this is not a tech blog. Still, I know a lot of you really do want all the specs, so here they are:
HS-7245MH Servo Specifications
Performance Specifications Operating Voltage Range (Volts DC) 6.0V ~ 7.4V
Speed (Second @ 60°) 0.13 ~ 0.11
Maximum Torque Range oz. / in. 72 ~ 89
Maximum Torque Range kg. / cm. 5.2 ~ 6.4
Current Draw at Idle 12 mA
No Load Operating Current Draw 190 mA
Stall Current Draw 1,600 mA
Dead Band Width 2 µs
Physical Specifications
Dimensions (Inches) 1.28 x 0.66 x 1.29 \
Dimensions (Metric) 32.4 x 16.8 x 32.8
Weight (Ounces) 1.20
Weight (Gram) 34.0
Circuit Type G2.5 Programable Digital
Motor Type Coreless Metal Brush Gear Material Metal
Bearing Type Dual Ball Bearing
Output Shaft (type / Ømm) Standard 24
Case Material Plastic
Dust / Water Resistance N / A
Connector Gauge (AWG) / Strand Count 22 / 60

This time all my HS7245MH were in flying planes, and I am loathe to pull apart something that is working and sorted. Like it seems with all my current projects, cash was short, but again, Hitec rescued me with a set of shiny new HS7245MH. Again, thanks to my friends at Hitec for hooking me up with these great servos and helping make this article possible. Also thanks to my friends in the Hitec service department who do such good work on the stuff I occasionally tear up.
Batteries
My current packs are Thunder Power 6s 3300 Lightning 55C and they have been exceptional batteries. They are a bit over two years old and have been run hard and often, so it's not surprise they are a little tired. What's surprising is how long that took. They still have plenty of pop, but I am coming down with less and less voltage. I have found when the capacity starts to fall off that's a good time to start scoping out new packs.

I wanted something as similar as I could get to my Lightning packs, so I went with their replacement in the lineup, the new Thunder Power Elite 55C. 6s 3300. This is the size pack I have found works best in these planes, being relatively light and still giving a reasonable amount of run time.
The 55C series has always been reasonably priced, and since switching to these I have not felt like I have given up any performance to the 70C packs I used to run. The only difference I could see was that I didn't have to spend as much money.
Set Up


Ailerons
Again I used my custom Xcessories 1.24" arm with 2mm holes drilled at 7/8": from center. This ends up being the same thing as a Hitec PN55709 arm. With the end points cranked, I am getting about 32-34 degrees of throw, which is what I like personally.


Elevator
Like always, I go for all the elevator I can steal and this time is no different. With the 1.25" Xcessories arm and end points cranked, I am at about 70 degrees of up elevator. I may move the ball link to the second hole because this is simply an insane amount of throw. I'm getting about 80 degrees!

Rudder
I ordered my Slick with the recommended Xcessories servo arm package. Included was a really sweet double arm for the rudder servo. It might seem like a small thing, but the red arm looks really great surrounded by all that carbon fiber in the radio compartment.

Flying
This article is getting a little long, like they all seem to, and people want the information now. We will come back as soon as we can and post some video, but the weather is looking a little dicey so it may be a day or two. We will have it as fast as we can.
Hell Yeah!

No comments:
Post a Comment